After removing our deck in 2007, we found exposed wood under the slider door. We assumed the previous owners had replaced the slider and didn’t bother fixing the broken stucco underneath the slider since they couldn’t access it due to the deck:

Except for a little surface dry rot, the wood was still solid. We treated it with a dry rot protector and covered it with a thick plastic. It was supposed to just be a temporary fix. We tried over the years to get contractors to fix it but it was too small of a job and we thought it was too complex for us to tackle.
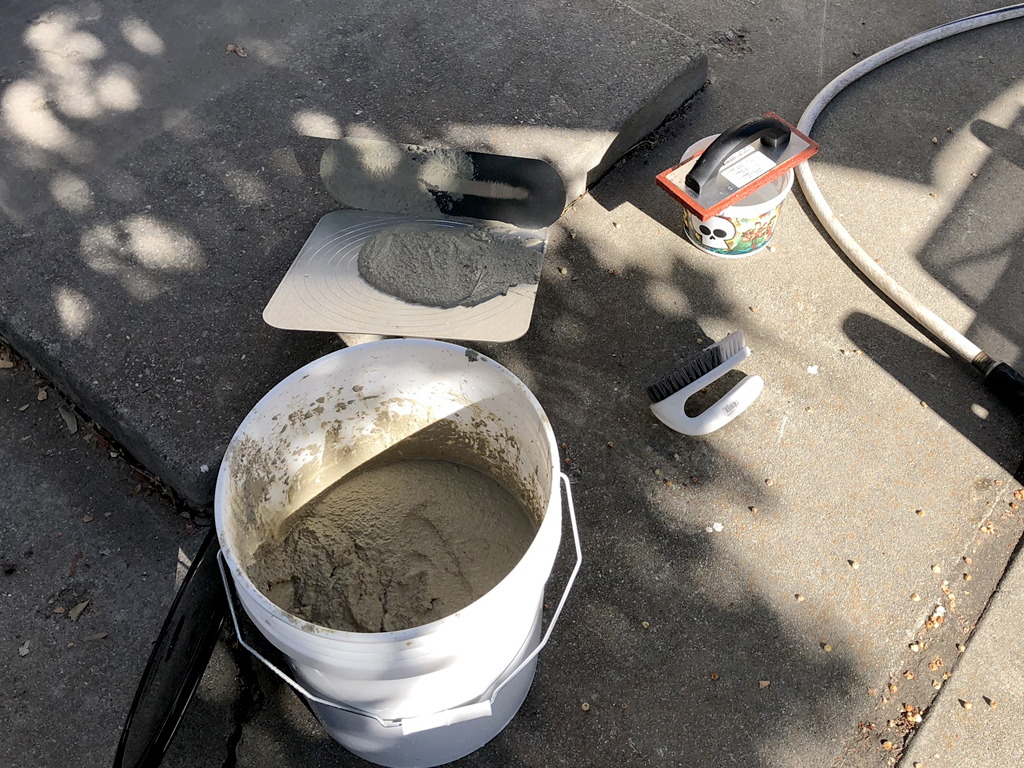
Recently, our pest control person reminded us that we should repair it. I was feeling more confident in our home repair abilities so I researched stucco repair and watched many YouTube videos. I bought some new tools: a rounded trowel, a hawk (to hold the stucco), and a red float (to help blend the new stucco into the old stucco):

First, we broke away any loose stucco and cleaned the area:

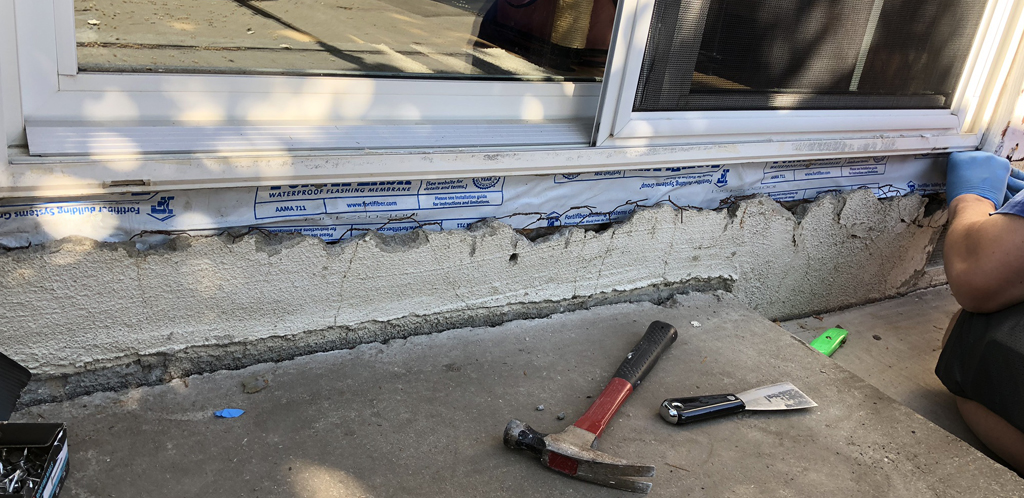
Then, we installed a waterproof membrane. We dry fit it first, then pealed and stuck it to cover the wood:

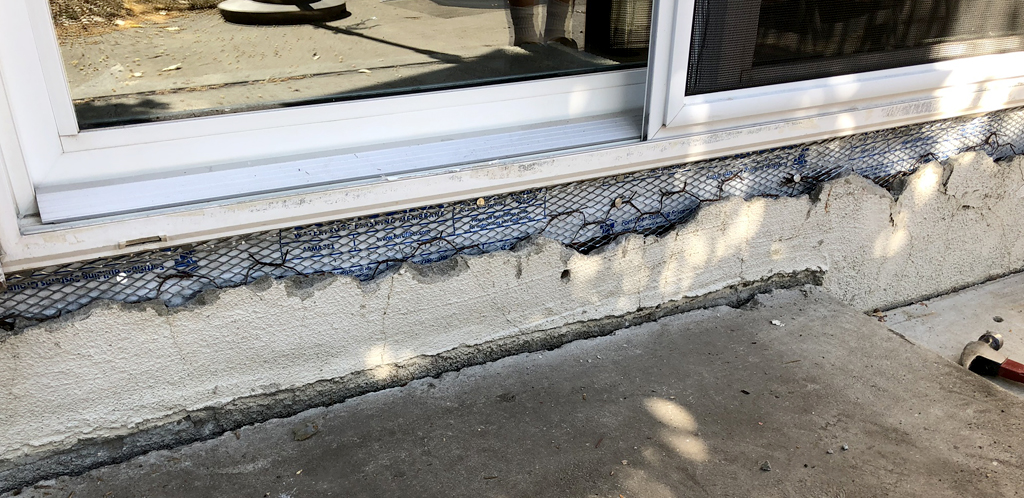
Next, we installed stucco metal mesh. This stuff is super sharp and gave me some nasty cuts. You should always use gloves when dealing with it, even when just picking it up at the store. We nailed it down with roofing nails that are rust resistant:

We first tried using pre-mixed stucco but it wasn’t covering enough and would’ve been too expensive overall. So we ultimately mixed our own. The finished stucco before a final coat:

I had a sneaking suspicion that the thick wood trim around the slider was hiding more missing stucco. The wood was starting to rot anyway so I wanted to replace it. Well I was right! To Mike’s dismay, the project just got bigger:

We realized that there were gaps between the wood and the slider frame. No one had bothered to fill the gaps with insulation. So Mike added spray foam insulation:

We then followed the same steps by adding a waterproof membrane and stucco mesh:


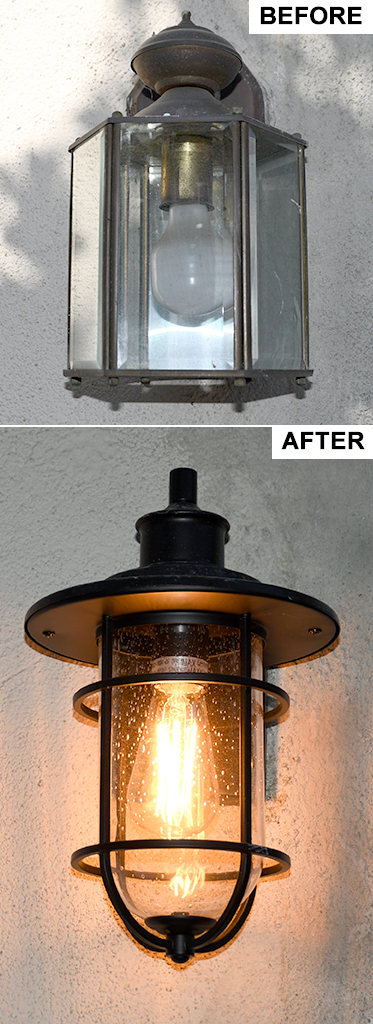
At the same time, we decided to update the outdoor sconce located next to the slider. We bought a black sconce with seeded glass. We used a clear sealant to seal around it:

This time when applying the stucco, it made a huge mess everywhere. I had figured it wouldn’t be too hard to clean up afterwards but it was a pain. If we do another stucco project, we will use tape to protect the window/slider frame. It took some time to clean off the stucco:

We finished the stucco but still need to add trim around the slider. We’re still deciding on the style of trim but we will use a PVC material (not wood). We know it doesn’t look perfect but we do plan on hiring professionals at some point in the future to add a smooth coat of stucco to the entire house. The finished stucco:

Overall, it wasn’t too complicated of a job. I was able to apply most of the stucco by myself. It was kinda fun, like smearing a milkshake on the wall, but messy.
************************************
RECEIPT
************************************
STUCCO REPAIR PROJECT
COMPLETED
NOVEMBER 2019
TIME FRAME
4 DAYS
DESCRIPTION
AMOUNT
Spray Foam Insulation
$4
Bucket & Lid 5 gal
$7
Waterproof Sealant
$8
Stucco Ready Mix 1qt
$8
Red Rubber Float
$9
Edison LED Amber Outdoor Bulb
$9
Stucco Metal Mesh
$11
Stucco Hawk
$14
Stucco Mix 50 lb Bag
$16
Trowel 14 in
$23
Flashing Membrane
$25
Outdoor Sconce Light
$68
TOTAL (9% SALES TAX INCLUDED)
$202
