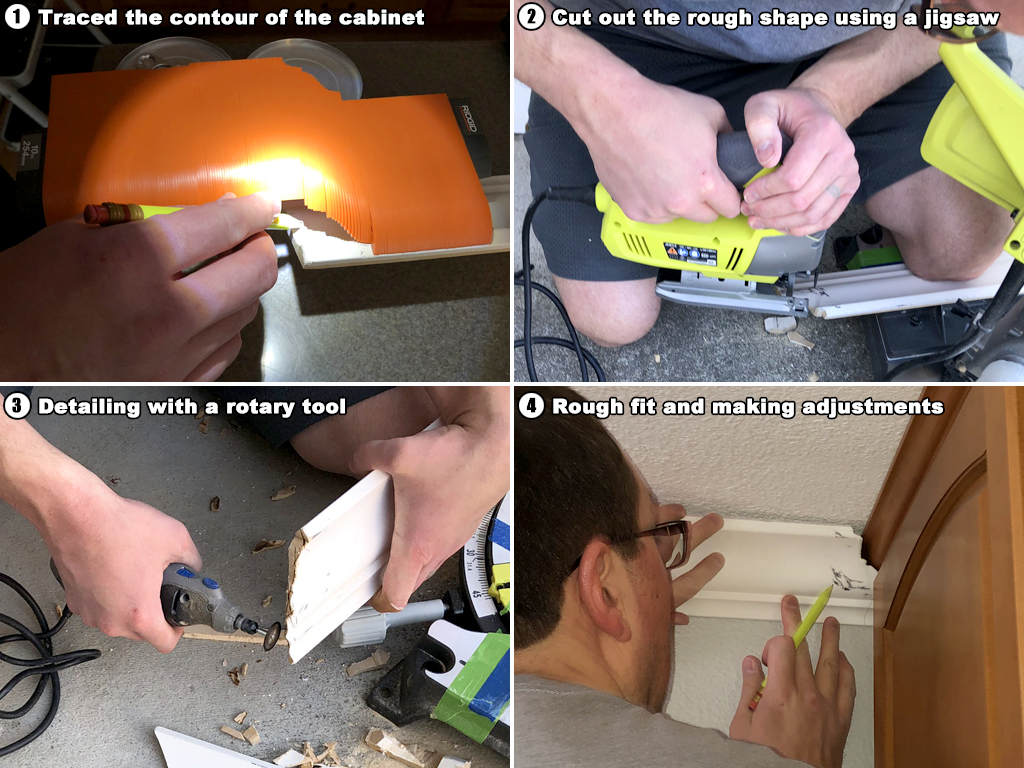
Our kitchen was the last room that needed crown moulding installed. We had delayed the installation because we weren’t sure how to connect the new crown moulding to the already existing kitchen cabinet crown moulding. The cabinet moulding is half the size of the rest of our crown moulding. It matches our cabinets though so we didn’t want to remove it. We finally came up with a solution after I discovered a contour tool.
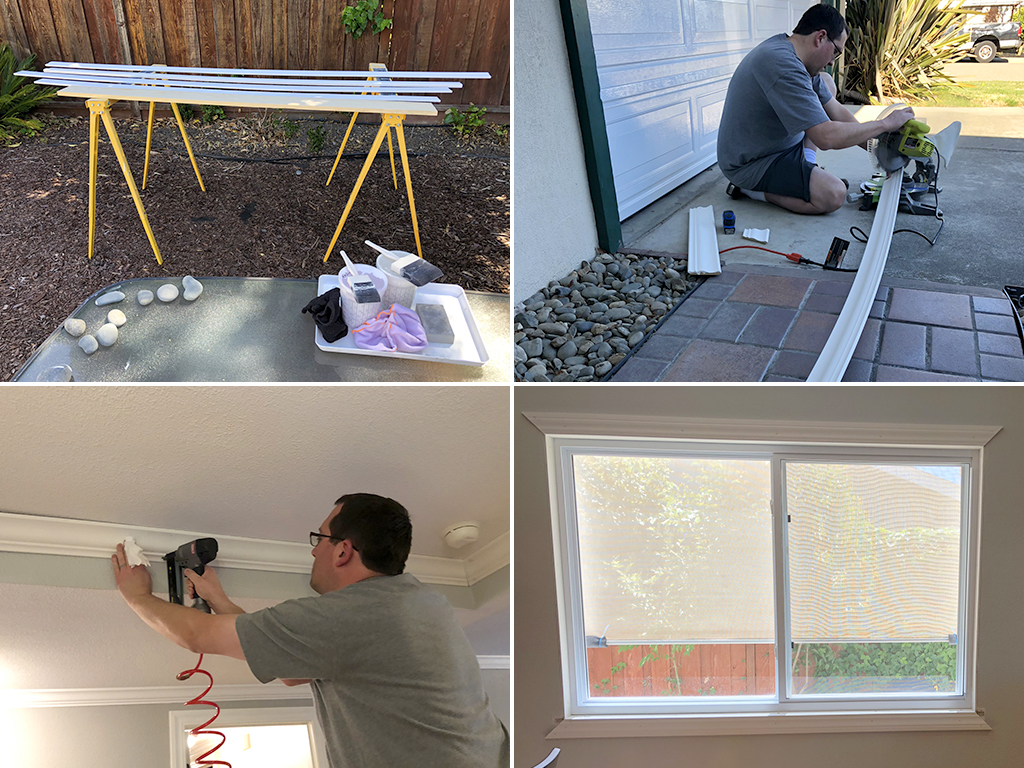
We started off the project by purchasing moulding from Home Depot:

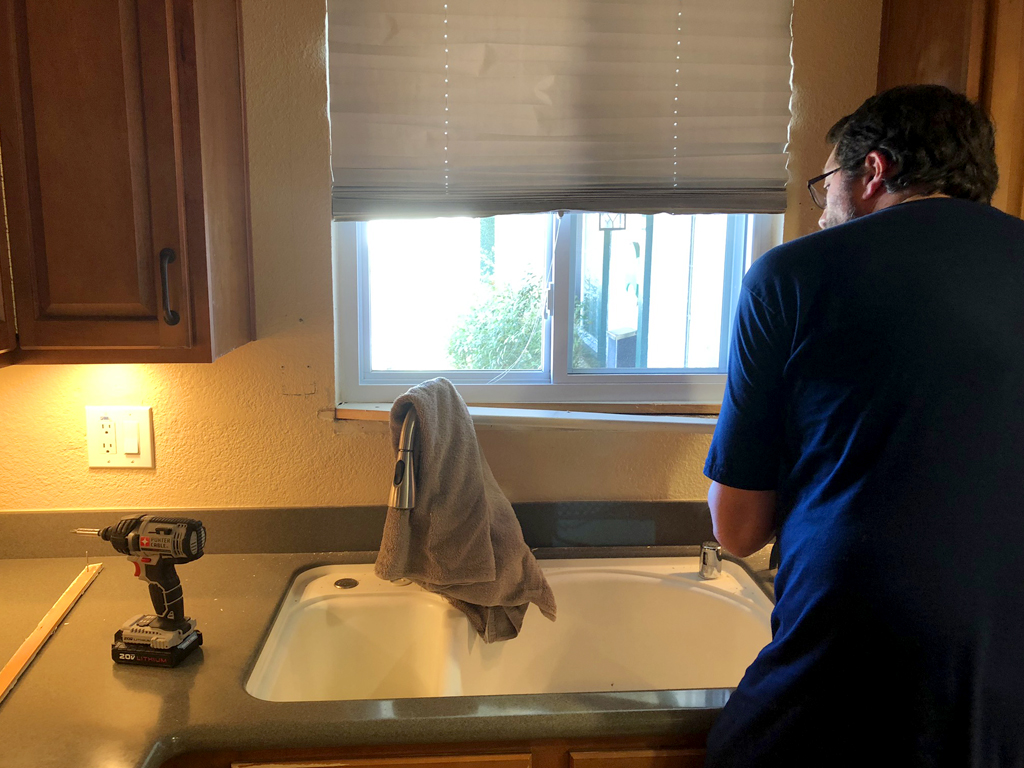
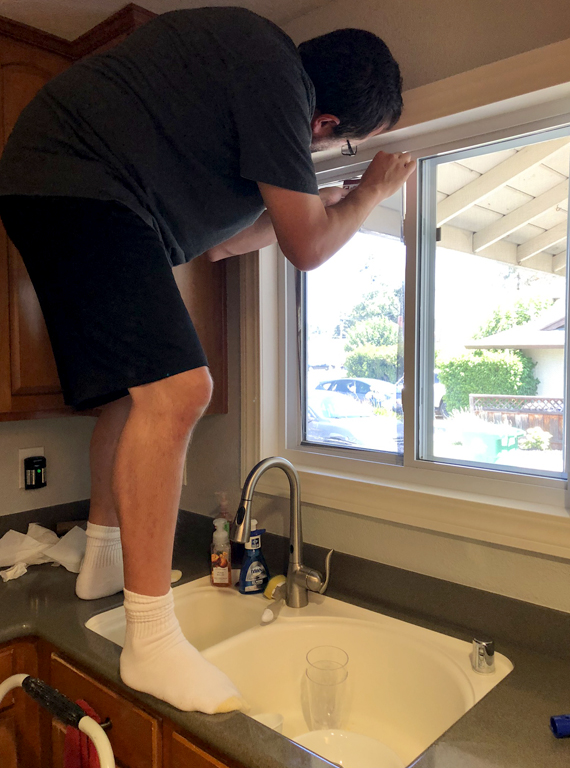
We decided to add moulding around our two kitchen windows at the same time to match what we had done in the rest of the house. We also replaced the window sills. Mike installing the new window sill:
Meanwhile, I painted all the kitchen walls a flat light gray color (Gray Owl) to match the rest of our rooms. I also painted all the moulding (Swiss Coffee). Afterwards, Mike cut the moulding to size and installed it:
Mike used the contour tool to figure out the cut for the crown moulding that would connect to the cabinets: 
The crown moulding Before and After:


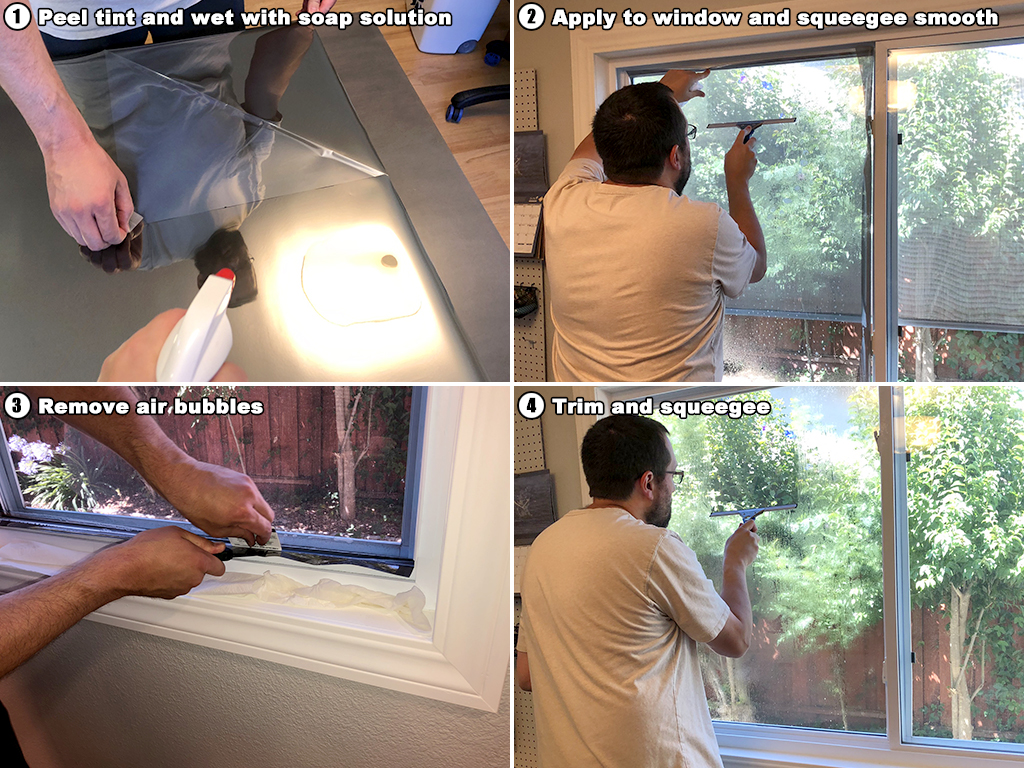
We applied tint to the windows as well. We like the filtered light and privacy it offers. We followed Gila’s how-to-videos. Measuring the film:

It’s definitely a job for two people. Some of the installation steps:
Our little kitchen window was more difficult to install:
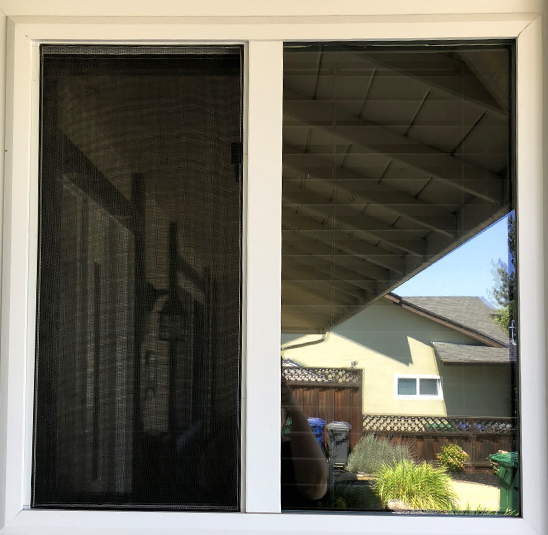
The outside view of the tinted window. It acts like a mirror during the day:
We didn’t add crown moulding between the cabinets since it would look weird. We plan to eventually add a backsplash that goes up to the ceiling instead. The small kitchen window Before and After:
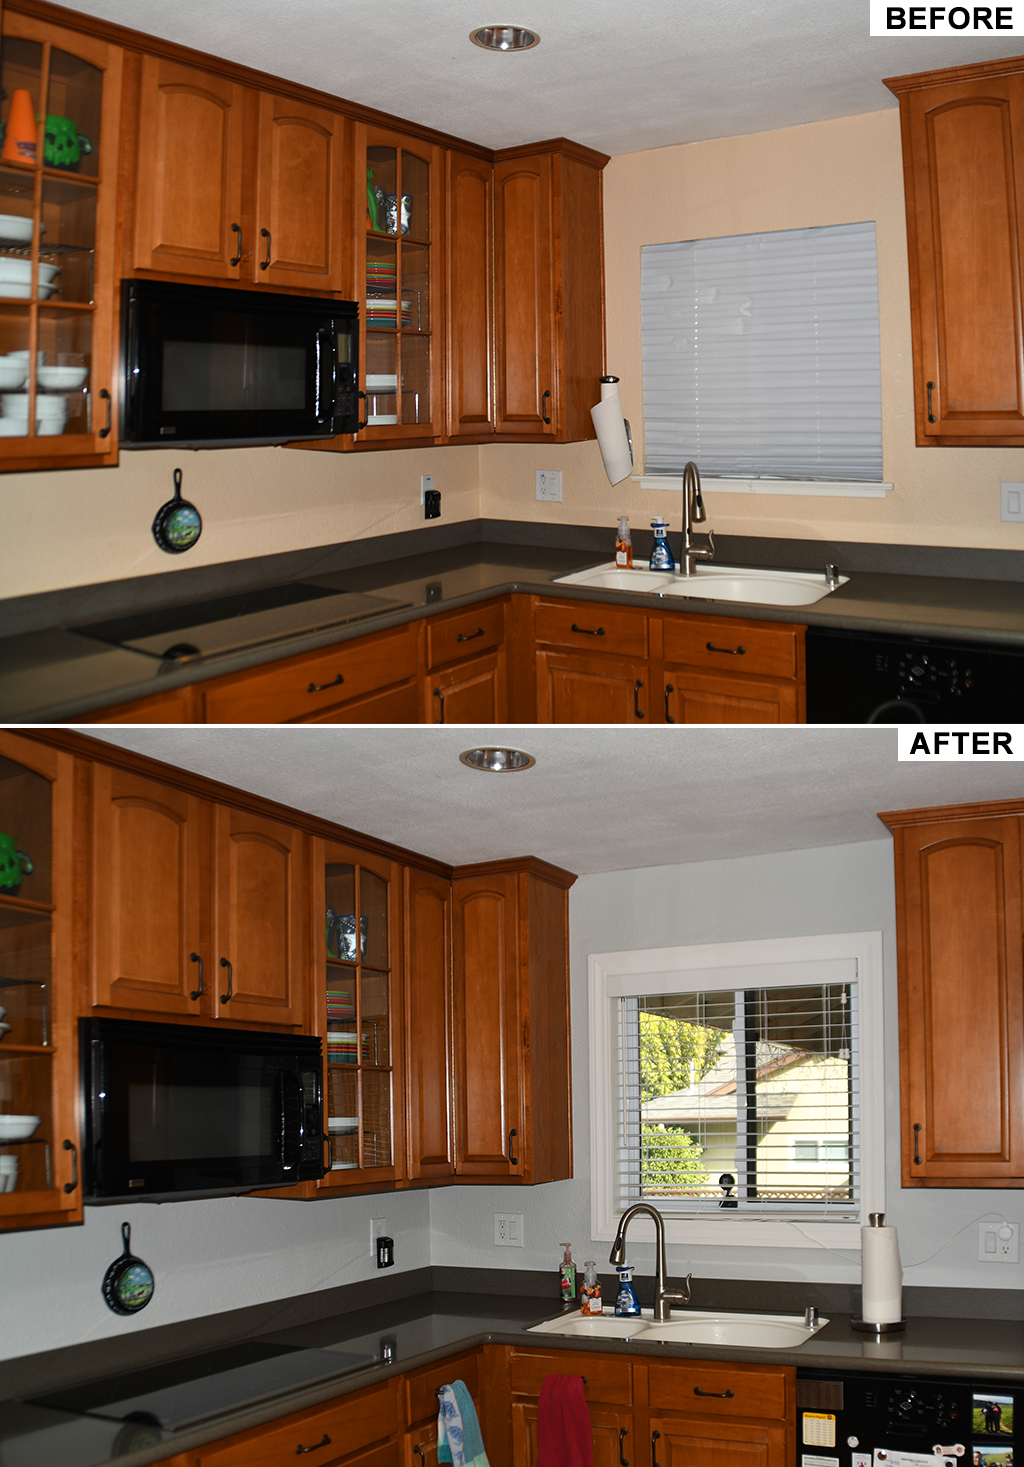
We also replaced our kitchen light with a Kichler Joelson pendant. The large kitchen window Before and After:

I wanted to add some shelves for storage but the look I wanted was too expensive to buy so we made our own. Although I’m not completely satisfied with the results, they do the job. Mike cut the unfinished whitewood board into two 7 3/8″ x 3′ 1/8″ pieces. The depth size fit exactly within the 8″ brackets we would use to hang them.
I stained them with pre-stain wood conditioner followed by a few coats of Gunstock colored stain (trying to match our kitchen cabinets). After a few days of drying, I added a coat of clear satin polyurethane to seal them.
The steps for creating the shelves:

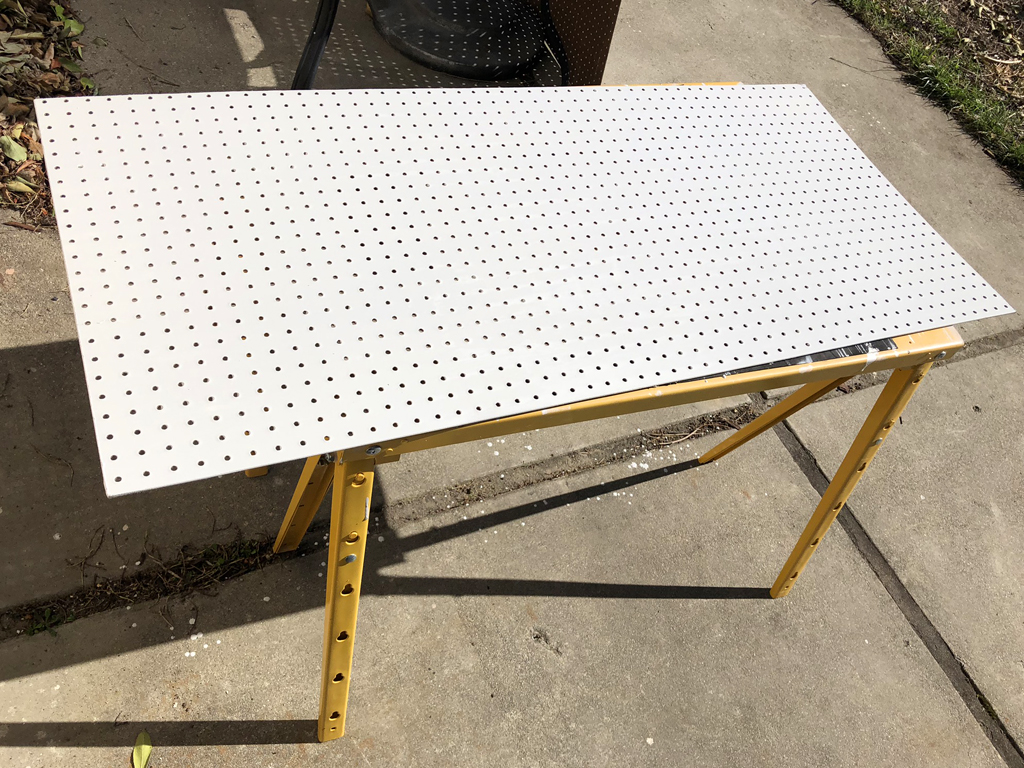
I also painted pegboard the same light gray wall color:
Mike hung the shelves using 8″ black steel brackets and he hung the pegboard:

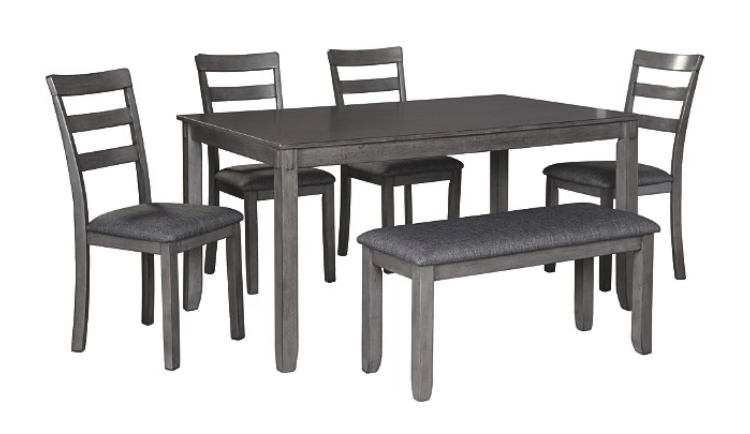
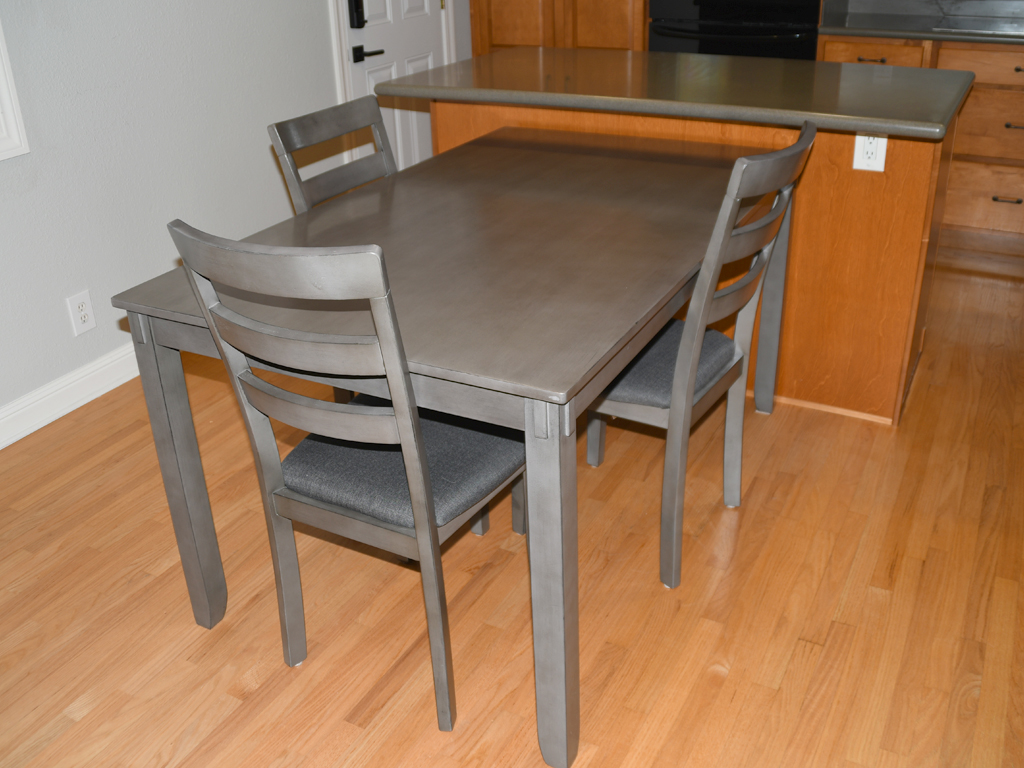
We also decided to downsize our dining table. Our new, smaller Bridson dining set:
I wanted the look of extending the island which also gives more space in the room:
We installed new blinds in both kitchen windows. The same Bali faux wood type as the rest of our windows:

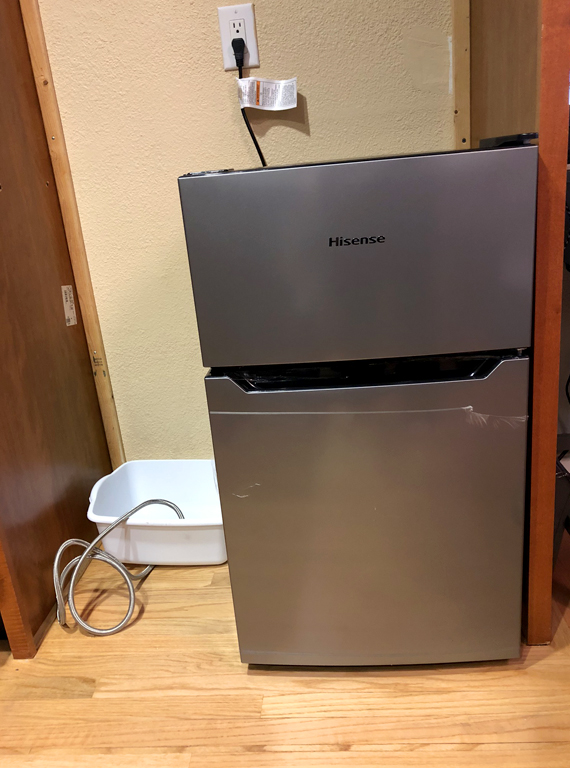
Between all our kitchen projects, our 20 year old refrigerator’s compressor broke. We figured it was time to upgrade anyway. However, it was during the height of the COVID pandemic so it was hard to find a new fridge in stock. We had to invest in a mini fridge to hold us over until we could find one:
I looked at it as an opportunity to paint the wall behind the fridge:

We ended up buying a Kenmore Elite refrigerator. It was the same brand as our other appliances and it had a good review from Consumer Reports. More importantly, it was available. All the other fridges we liked weren’t going to be available for 4+ months. We also decided to go with counter-depth and stainless steel (our old one was black):
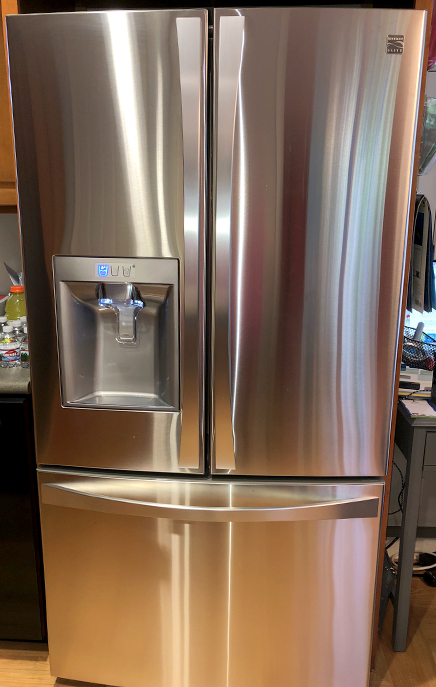

The refrigerator is also a Smart appliance. We love Smart appliances! Our Smart app:

Overall, we’re happy with all the updates especially our window blinds and tint. We keep all the blinds open throughout the day now. We also like the extra space we get from our new dining table.
************************************
RECEIPT
************************************
KITCHEN UPDATE PROJECT
COMPLETED
AUGUST 2020
TIME FRAME
3 MONTHS
DESCRIPTION
AMOUNT
Pegboard Hooks
$3
Wall Outlet Cover Jumbo – x 2
$3
Unfinished Whitewood Board 1″ x 4″ x 4′ – x 2
$5
Varathane Gunstock Classic Wood Interior Stain 1 qt.
$8
Plastic Drop Cloth 6 pk
$9
Pegboard
$10
Ridgid 10″ Contour Gauge
$11
Paint Supplies (rollers, brushes, tray)
$12
Varathane Clear Satin Polyurethane 1 qt.
$12
DAP Alex Fast Dry White Caulk – x 4
$13
Varathane Pre-Stain Wood Conditioner 1 qt.
$14
Pegboard Steel Mesh Basket – x 2
$24
Behr Gray Owl Interior Paint 1 gallon
$28
Behr Swiss Coffee Interior Paint 1 gallon
$28
Pine Wood (for sills) 1″ x 6″ x 6′ – x 2
$35
Smooth Pine Wood (window trim) 1/2″ x 2 1/2″ x 24′
$42
Gila Titanium Heat Control Window Film 36″ x 180″
$43
Crates & Pallet 8″ Black Steel Shelf Bracket – x 4
$55
Bali 2″ Faux Wood Blinds Milky Way (small window)
$58
Crown Moulding Primed Pine 3 5/8″ x 44′
$87
Casing Moulding Primed Pine 5/8″ x 3 1/4″ x 44′
$93
Bali 2″ Faux Wood Blinds Milky Way (big window)
$136
Hisense 3.3 cu ft Freestanding Mini Fridge
$155
Kichler Joelson 17.75″ Brushed Nickel Light
$196
Bridson Dining Table Set
$563
Kenmore Elite 75043 24 cu ft Refrigerator
(includes $69 delivery)
$1,997
TOTAL (9% SALES TAX INCLUDED)
$3,640