Replacing our back door has always been on our To Do List. The door had a huge gap at the bottom that made it so mice didn’t even need to duck to get in. I’m not sure if the door was original to the house being built in the 1960’s but it looked it:

We tried blocking the gap on the inside as best we could:

We decided to tackle replacing the door when Mike had some time off. I tried to order this style of door but they all had a 4+ month lead time:

Ultimately, we decided not to order a custom door since we were a little worried about any issues we would find after removing the old door. We decided it would be best if we took out the old door completely, measure the rough opening and then buy an in-stock door. An in-stock door is cheaper anyway in case we screw anything up on our first door installation.
We started with removing the hinge pins:

The door came out fairly easy. Removing the door frame and trim was much more difficult:

Mike wore a face shield for protection from all the flying wood pieces:

One interesting thing we found was that the door frame was put together with puzzle-like pieces of wood that connected together:

Our rough opening was 31 1/2″ W x 81 1/2″ H so that meant we could fit a 30″ pre-hung door. The door jam wood was in great condition so we didn’t need to do any repairs. Our 50 year old wood is solid as a rock:

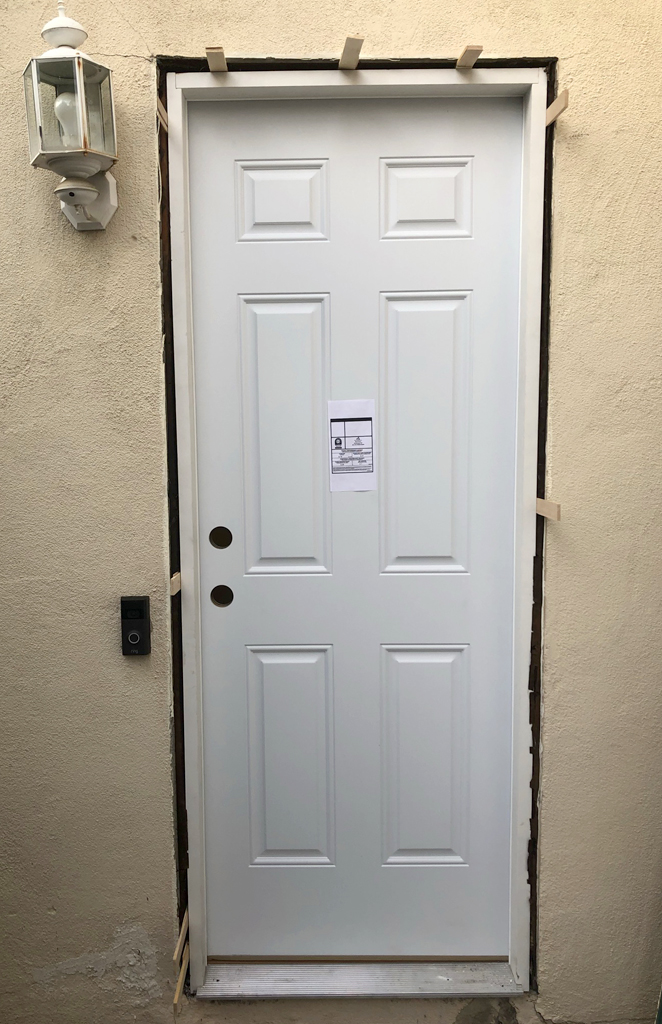
I searched Home Depot and Lowe’s online for in-stock doors in our size. A 30″ door isn’t that common so we only had a flat panel or 6-panel door to choose from. We decided on a ReliaBilt steel 6-panel 30″ x 80″ left-hand inswing pre-hung front door.
Luckily, the door fit in our car with no problems. We did a dry fit when we got home. It was snug but it fit:

After checking that the door’s threshold was level, Mike added caulk before setting the door:

It was a long process of trial and error to get the door plumb and square while using shims. Once we got it perfect, Mike added screws through the shims:

Checking for level:

The new door set with shims:
After snapping the shims, Mike added spray foam insulation to the inside and outside:


One issue we had was the door frame didn’t sit flush with the stucco. Since we would be adding trim we needed to build out the door frame so it was flush. Measuring wood for the door frame:

Cutting the wood:

Mike used glue to reinforce the wood pieces:

Afterwards, he nailed them as well:

Before adding trim, we decided to stucco the small gap around door. The gap was there with the old frame too. We didn’t like knowing that there would be a gab under the trim. We wanted to weatherproof the door as much as possible. Although we realized afterwards that the gap was for expansion/contraction of the stucco. Oops!:

I painted all the outdoor trim and interior moulding:

Click here for the post on installing outdoor trim
We installed a door handle as well. We used a Kwikset Pismo door knob and a Kwikset Aura smart deadbolt. We love the smart lock and will add this on all our exterior doors. We also added a piece of trim for the doorbell to sit on. I think it gives it a more finished look:

We also replaced the light fixture next to the door. It’s a good thing we did because we found wasp nests inside it. Yuck!

Installing the Turner light sconce was pretty straight forward:
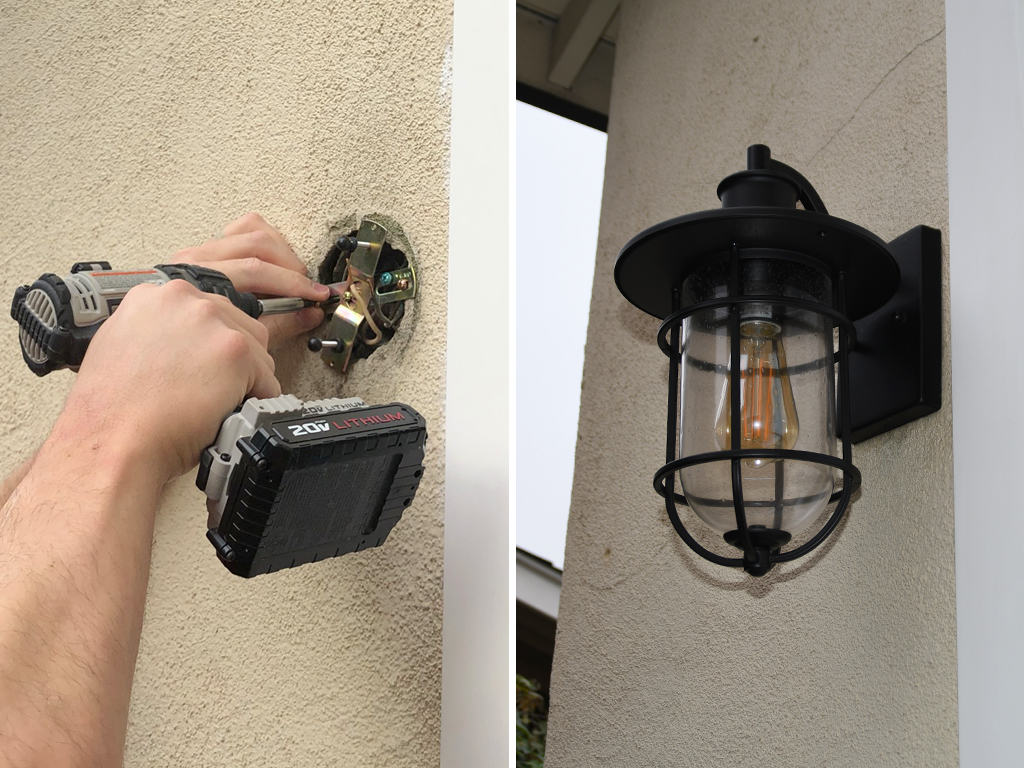
We used an edison LED bulb for a soft glow:

Lastly, I caulked everything. Before & After pictures:


The door still needs to be painted but we’ll wait until we paint the entire house to determine the color.
************************************
RECEIPT
************************************
BACK DOOR REPLACEMENT PROJECT
COMPLETED
NOVEMBER 2020
TIME FRAME
3 DAYS
DESCRIPTION
AMOUNT
Spray Foam Insulation
$4
DAP Dynaflex 230 Clear Caulk (for light fixture)
$5
DAP Dynaflex 230 White Caulk
$5
Wood Shims
$6
Drywall Screws 3″ box
$6
Edison LED Outdoor Bulb 40 Watt ST19
$9
Door Mat 18″ x 30″
$14
Kwikset Pismo Round Entry Door Knob
$44
Globe Electric Turner 1-Light Black Outdoor Sconce
$68
Interior Pine Casing 3 1/4″ x 5/8″ x 17′ – x 2
$75
Kwikset AURA Smart Lock
$139
ReliaBilt 30″ x 80″ Steel LH Inswing Prehung Door
$227
TOTAL (9% SALES TAX INCLUDED)
$602
*Stucco mix cost not included since we had some from another project
*Outdoor trim cost included with Outdoor Trim Project Receipt