Mike has been wanting to install ceiling speakers in our living room for a very long time. Finally, we got around to doing it. We purchased In-Ceiling Yamaha Speakers.
Step 1: Mike used a stud finder to locate the beams, designating their location with blue tape.
Step 2: He used the speaker template (provided with the speakers) and measured equal distances from the moulding: [Note: we decided to install the speakers closer to the walls to be more hidden but some people prefer them closer to the middle of the room.]

Step 3: He punched a hole at the center of template:

Step 4: Mike created this shape out of a coat hanger. He put it in the hole and turned it to confirm that there were no obstacles in the way of where the speaker would go (before cutting into the ceiling):


Step 5: He used the template to set the radius for the drywall circle cutter tool:

Step 6: He used the circle cutter tool to score the drywall in a circle shape:

Step 7: Then, he used a drywall saw to cut the hole out:

It will get messy if you have blown-in attic insulation (like us) hence the need for the face shield:

Step 8: Mike added speaker protective covers:

Step 9: He installed the speakers (they clamp onto the drywall, holding them up):


The speakers with the cover on:

Mike installed 4 speakers total (one in each corner).
Step 10: We wanted the wires to come down through the wall (from the attic) near where the audio receiver is located. There is an electrical outlet nearby so we followed it up the wall hoping we could use the same hole in the fire block (horizontal piece of wood between the studs). We used a stud finder to locate the fire block and opened the drywall right above it. Unfortunately, the holes for the electrical wires were too small so Mike would have to cut a larger hole.
But first, Mike headed up into the attic to wire the speakers:

He connected 14/2 speaker wire to each speaker and fed the wires over to where they would go down into the wall. He also stapled the wires to the joists.
Then, Mike used a fish tape tool to feed the cables down the wall. This is where you definitely need two people. As Mike fed them, I located them through the opening and blown-in insulation (messy!) with the help of a bendable magnet retriever. I pulled each wire out of the hole – 7 total. He pre-wired for additional speakers in case he adds more.
Mike was in the attic for a few hours so when he got back down, he needed a day to rest. He was very sore for being in such a tight space for so long. We also don’t have a floor in our attic so he had to balance himself on the joists.
Step 11: The next day, Mike drilled a hole through the fire block so he could continue feeding the wires below:


Step 13: He created another opening below (level with the outlet) and continued to feed speaker wire through the hole to the other opening.
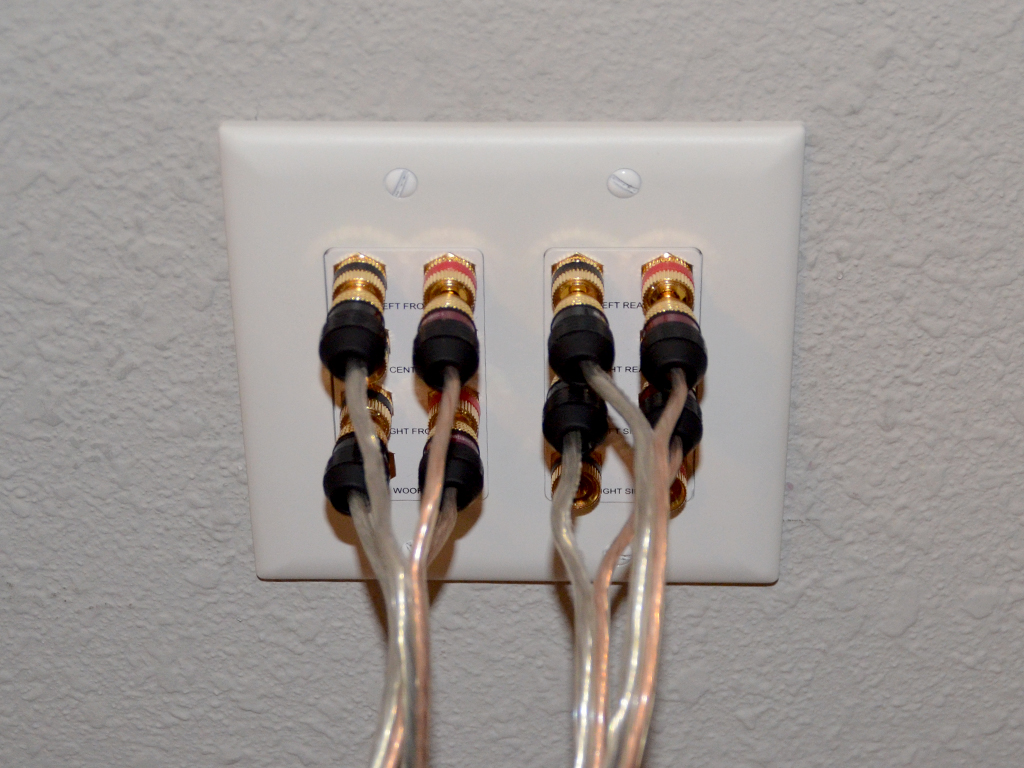
Step 14: Mike connected the wires to a multi-way binding posts connector and added an electrical box to the hole:


Step 16: He used fireblock foam to seal the hole in the fire block:

Step 17: We closed up the first hole using joint compound:


We tried matching the wall texture using texture spray. The final wall repair result:

The speakers are all hooked up. Honestly, I don’t notice the sound difference but Mike supposedly does. Go figure!

************************************
RECEIPT
************************************
IN-CEILING SPEAKERS PROJECT
COMPLETED
NOVEMBER 2018
TIME FRAME
2 DAYS
DESCRIPTION
AMOUNT
Speakers cost x 4
$194
Speaker wire
$85
Multi-way binding posts connector
$54
Ceiling speaker protective covers x 4
$37
Banana plugs x 12 pairs
$21
Steel fish tape 25ft
$13
Drywall circle cutter tool
$10
Fireblock foam
$7
Bendable retrieving magnet tool
$6
Electrical box
$3
TOTAL (9% SALES TAX INCLUDED)
$430
