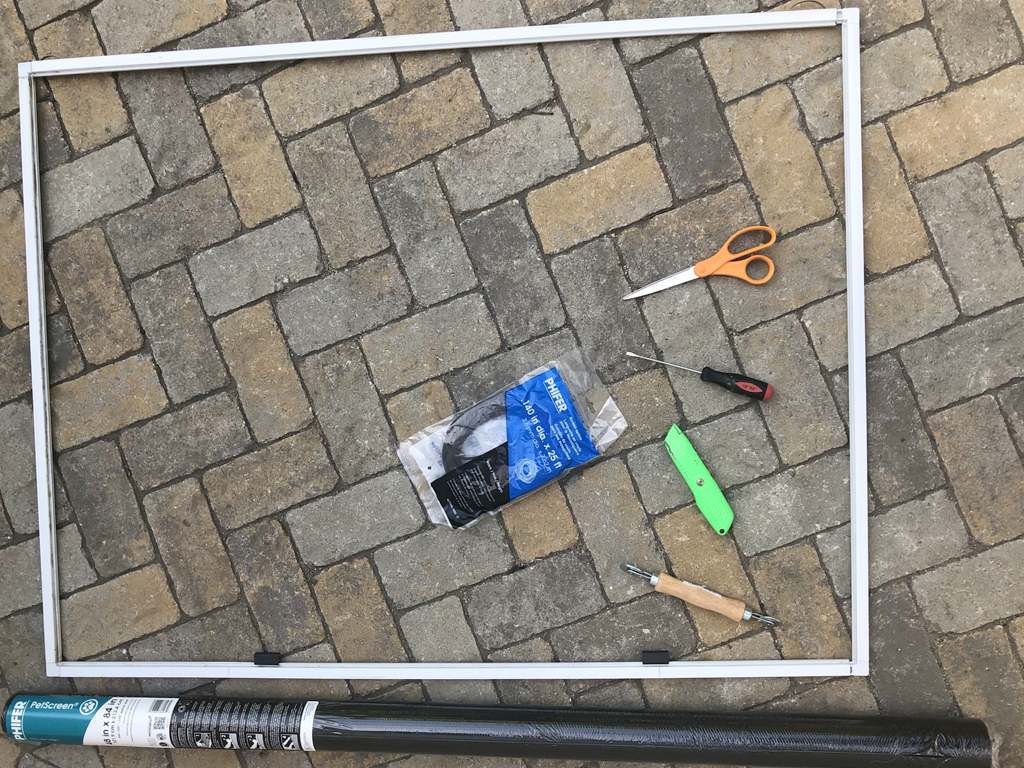
I bought enough supplies to replace five window screens. I decided to use pet resistant screen since it’s stronger than typical screen. It’s made with vinyl coated polyester yarn and it is pet, puncture and tear resistant.
The first step is removing all the old screens. It’s super easy since the screen is just being held on with spline. I started the project outside with all the supplies needed:
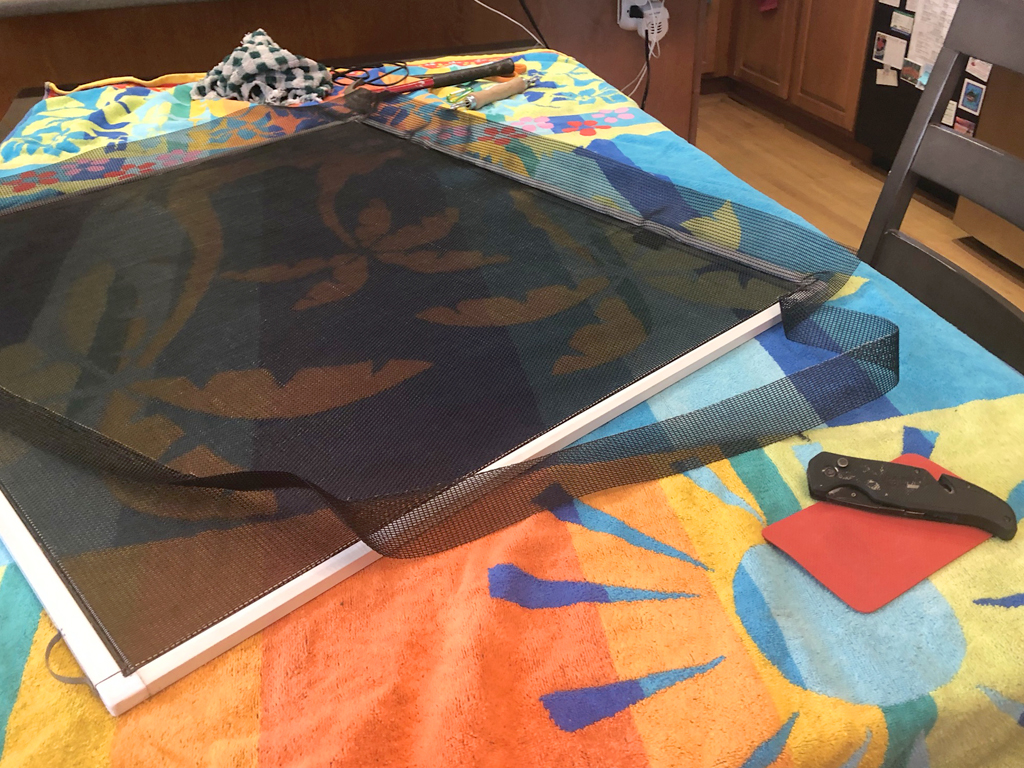
I cut the screen fabric a 1/2″ wider than the screen frame:

It started getting too hot outside so I continued the project inside on our kitchen table:
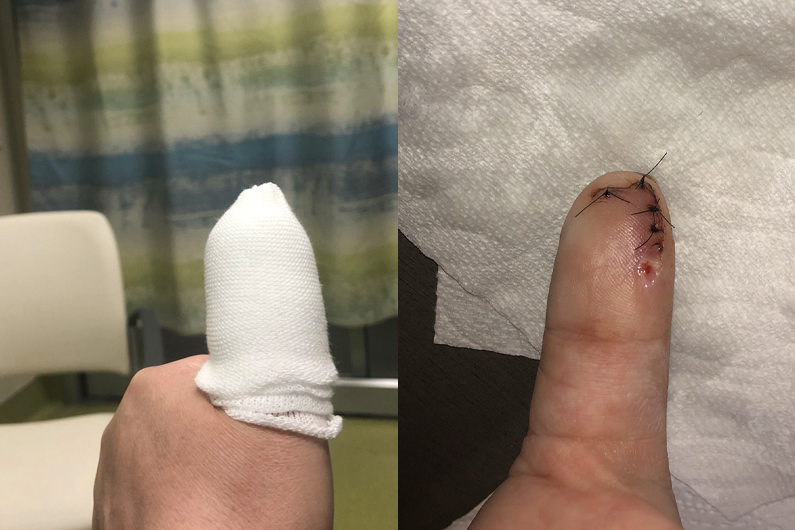
The one negative with using pet screen is that it is really thick and it takes a lot of force to cut through it. I had to switch to a sharper utility knife in order to cut through the screen. While trimming the screen, the knife slipped and cut into my thumb. The pain was intense and I ended up needing 4 stitches to close the wound:
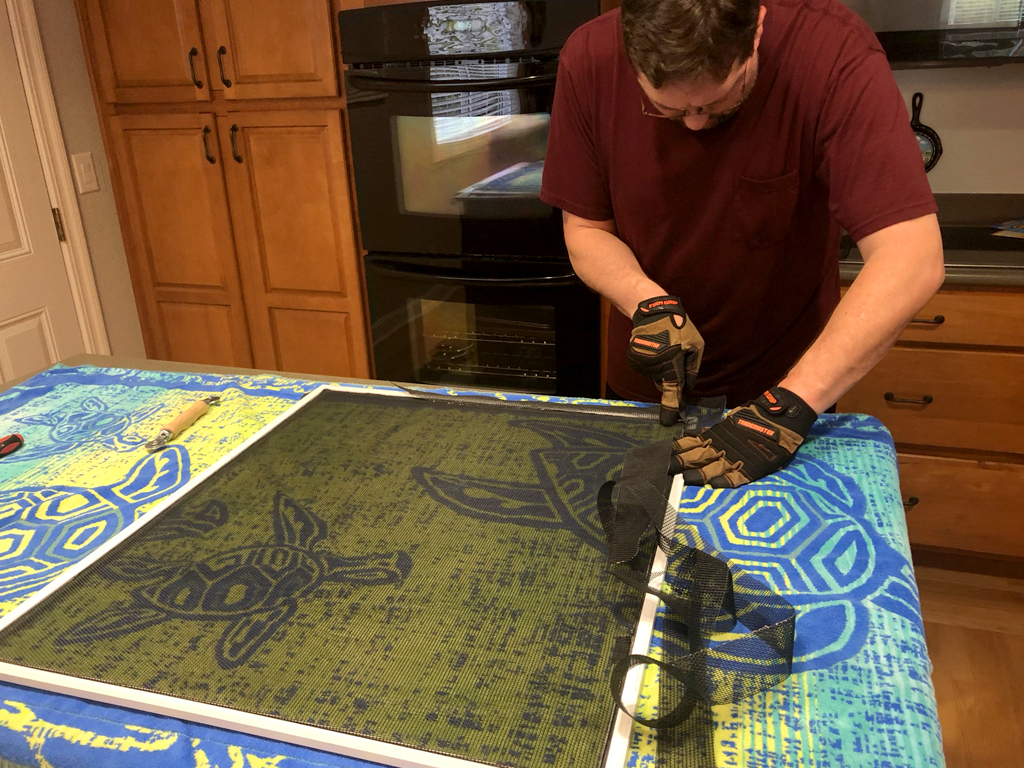
I couldn’t use my thumb for a couple of months so Mike finished the project for me. He used gloves (unlike me) when trimming the screen:
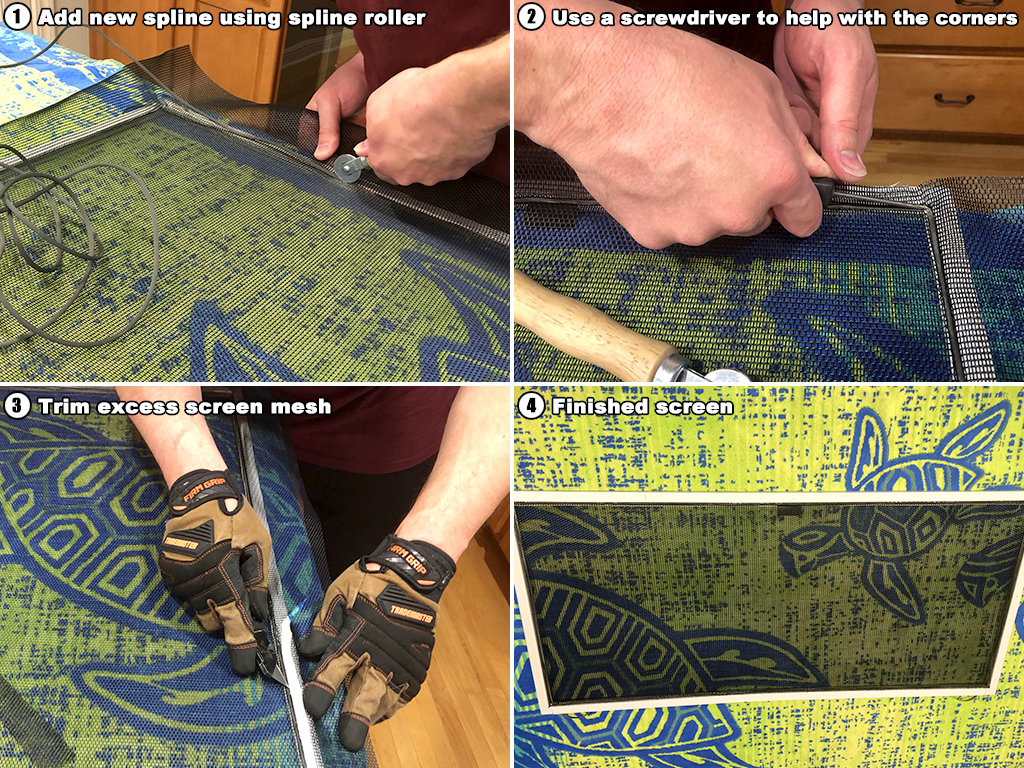
The steps we used to add the new screen:
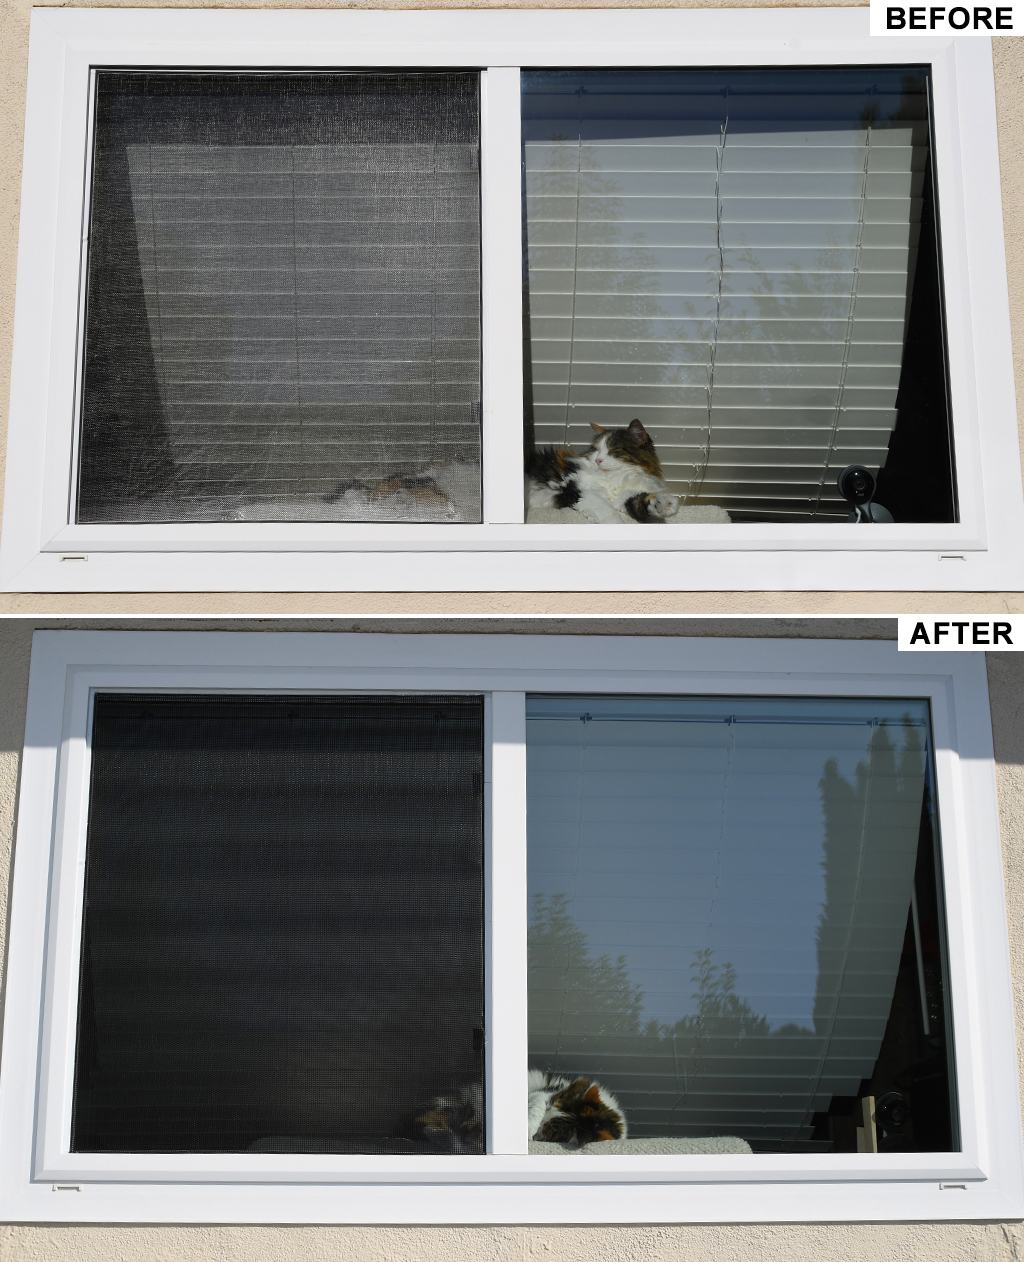
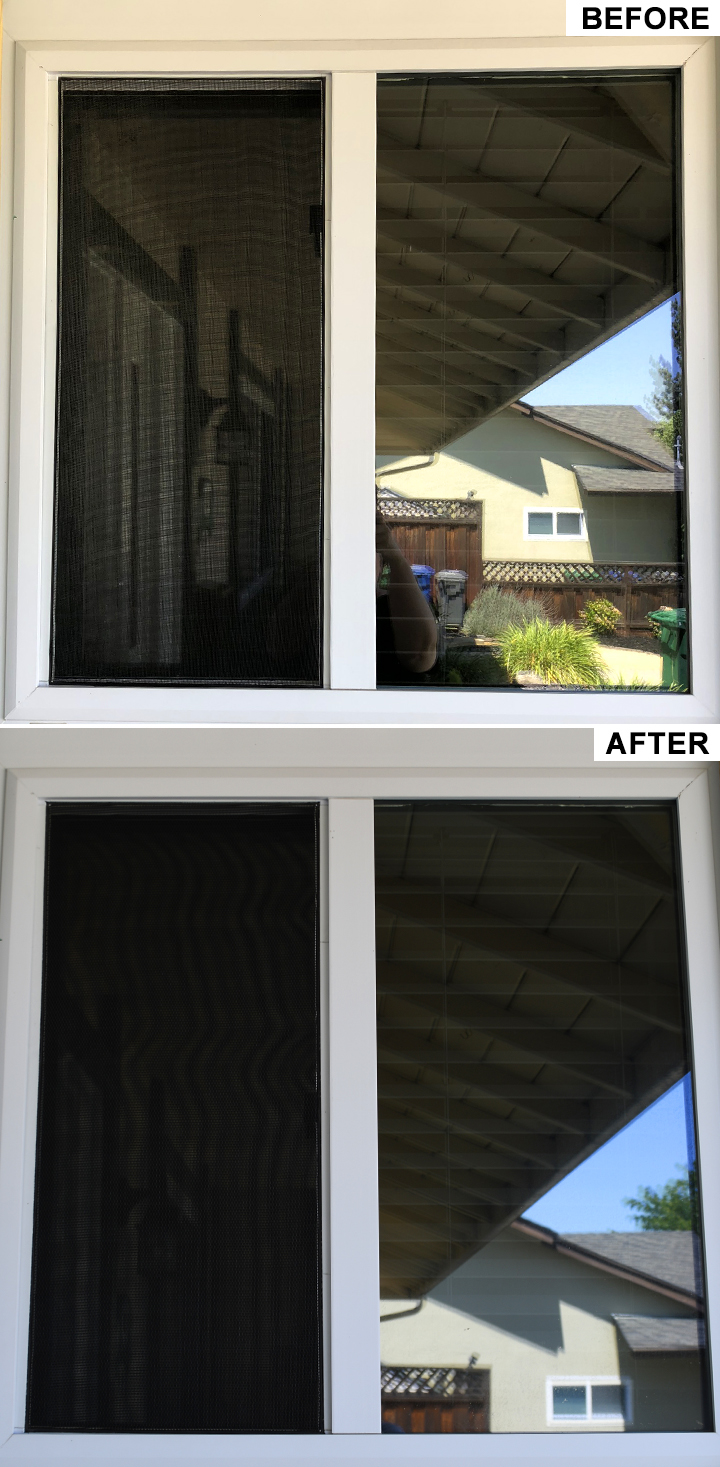
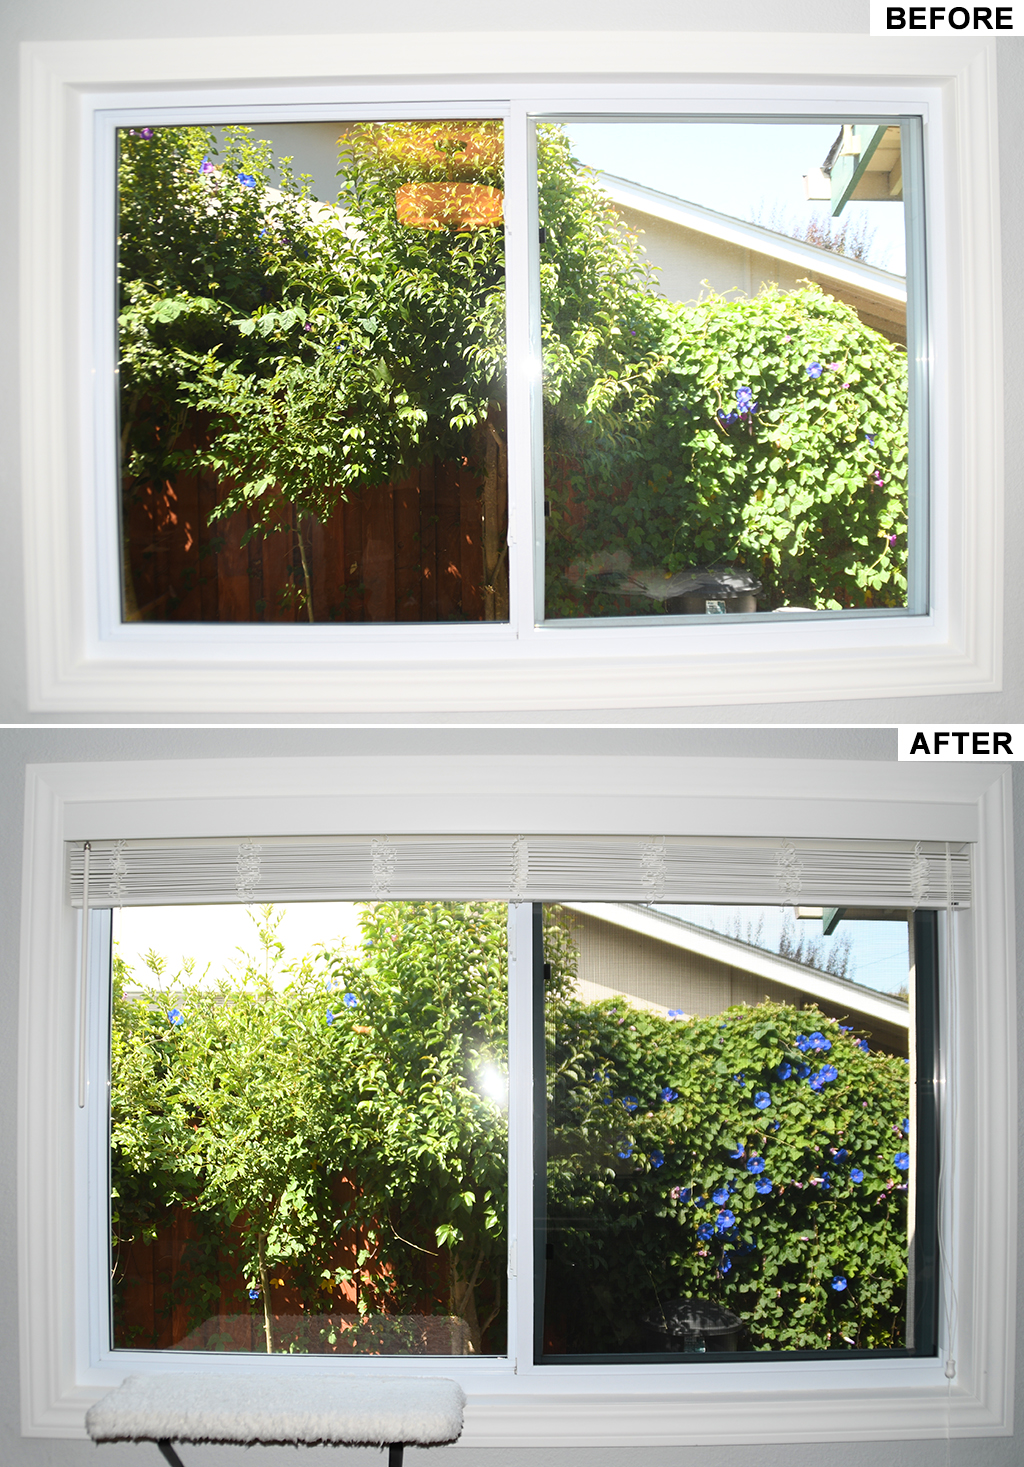
Before and After pictures:
Overall, this project can give you a bigger bang for your buck. If I were to do it again, I think I’d use the thinner, typical screen so it would be even easier to install. Also, the thicker pet screen can obscure the view out the window slightly more than a normal screen although it doesn’t bother us.